Hardware & PC Troubleshooting Hub: Masterful Ways to Fix System Errors
Table of Contents
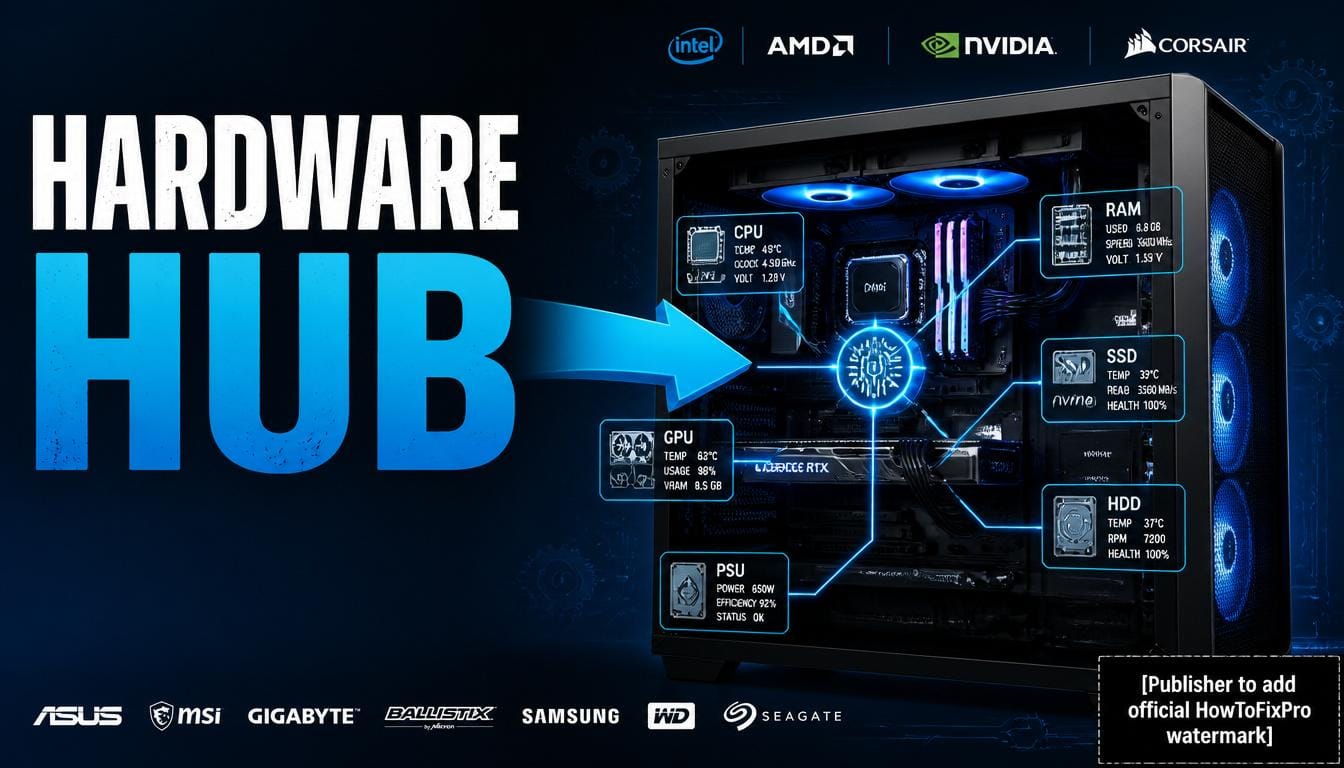
Hub: Hardware & PC Troubleshooting Hub
Introduction – The PC Hardware Ecosystem
Your computer is a symphony of interconnected components—CPU, GPU, RAM, storage drives, power supply, motherboard, and peripherals all working in harmony. When one component falters, the entire system can suffer from crashes, slowdowns, or complete failure. This comprehensive hardware and pc troubleshooting hub is your ultimate reference for diagnosing and resolving the most common PC hardware issues.
Hardware failures typically fall into several categories:
- Storage & Drive Issues – Dead drives, RAW file systems, clicking noises, overheating SSDs, and slow transfer speeds.
- Memory & CPU Problems – RAM not running at advertised speeds, XMP boot failures, CPU overheating after microcode updates, and BSOD errors.
- Graphics & Display Issues – GPU coil whine, second monitor detection failures, webcam flickering, and PCIe compatibility.
- Power & Battery Problems – Laptop battery not charging, PC shutting down under load, and power supply failures.
- Peripherals & Connectivity – Mechanical keyboard chattering, RGB software issues, KVM switch detection failures, Thunderbolt/USB4 problems, and Wake‑on‑LAN failures.
- USB & SD Card Issues – Write‑protected errors, read‑only errors, wrong capacity readings, and Diskpart solutions.
- BitLocker & Security – Recovery screen loops after TPM updates and BIOS changes.
- Advanced Error Codes & BSOD – WHEA_UNCORRECTABLE_ERROR, KMODE_EXCEPTION_NOT_HANDLED, PAGE_FAULT_IN_NONPAGED_AREA, and SYSTEM_SERVICE_EXCEPTION.
Before diving into component‑specific guides, here’s a universal checklist compiled by our hardware and pc troubleshooting hub expert team that works across most PC hardware issues:
- Check connections – Loose cables, improperly seated components (RAM, GPU, M.2 drives) cause a surprising number of issues.
- Monitor temperatures – Use HWMonitor, MSI Afterburner, or Core Temp to check if overheating is the culprit.
- Update drivers and BIOS – Outdated firmware is a leading cause of hardware compatibility and performance issues.
- Test components individually – Isolate the problem by swapping known‑good parts or using diagnostic tools.
- Check your power supply – An underpowered or failing PSU can cause random shutdowns, crashes, and instability.
This hardware and pc troubleshooting hub consolidates hand‑tested guides covering every major PC component. Bookmark it for quick access whenever you encounter a hardware problem.
📌 Quick Tip: Start with PC Shuts Down Under Load, WHEA_UNCORRECTABLE_ERROR BSOD, or NVMe M.2 SSD Not Showing in BIOS for the most common hardware issues managed within the hardware and pc troubleshooting hub network.
Storage & Drive Issues
Storage drives—HDDs, SSDs, and external drives—are among the most failure‑prone PC components. The most common storage issues treated in this hardware and pc troubleshooting hub segment include dead drives with no power, RAW file systems, clicking noises, overheating during large transfers, and slow transfer speeds.
A dead hard drive with no power often results from faulty cables, power supply issues, PCB damage, or internal component failure. The first step is always to check power connections and try a different USB port or power adapter. If the drive makes clicking sounds, it likely has mechanical or PCB damage—immediately disconnect the drive to prevent further damage. If you need a premium storage health check utility, consult the official Crucial Storage Support Docs for specific diagnostic procedures.
An external hard drive showing RAW file system means Windows cannot recognize the file system structure. This is often caused by improper ejection, power surges, or file system corruption. The most effective fix is to use CHKDSK first, then TestDisk to rebuild the partition table if CHKDSK fails.
External SSD overheating during large transfers occurs when the drive’s controller reaches temperatures above 70°C, causing thermal throttling. Adding a heatsink or thermal pad, using a ventilated enclosure, or transferring files in smaller batches can resolve this.
- Dead Hard Drive No Power – Diagnose and recover data from drives that don’t spin up or get detected. Covers checking cables, trying different USB ports, using external enclosures, and professional recovery.
- Device Not Ready Error External HDD/SSD – Fix “The device is not ready” errors caused by connection issues, driver problems, or file system corruption.
- External Hard Drive Shows RAW File System – Recover data from RAW drives without formatting. Covers CHKDSK, TestDisk, and third‑party recovery tools.
- External HDD Clicking Noise – The “click of death” guide. Explains why clicking occurs (read/write head failure, service area damage) and when to contact professional recovery services.
- External SSD Overheating During Large Transfers – Fix thermal throttling with heatsinks, ventilated enclosures, and batch transfers.
- External SSD Slow Transfer Speed USB-C – Fix slow speeds caused by wrong cables, wrong ports, file system issues, and write caching.
- External SSD Slow Transfer Speed – Alternative Guide – Additional fixes including USB power saving, driver updates, and front vs. rear USB ports.
- NVMe M.2 SSD Not Showing in BIOS – Fix detection failures caused by loose connections, incorrect BIOS settings (UEFI vs. CSM), and shared PCIe/SATA lanes.
- Wake-on-LAN (WOL) Not Working After Sleep – Fix WOL failures by enabling WOL in BIOS, disabling Fast Startup, and configuring network adapter properties.
Memory & CPU Problems
Memory and CPU issues can cause system instability, crashes, and poor performance. In the hardware and pc troubleshooting hub ecosystem, the most common problems include DDR5 RAM not running at advertised speeds, PC won’t boot after enabling XMP, CPU overheating after Intel microcode fixes, and WHEA_UNCORRECTABLE_ERROR BSOD.
DDR5 RAM not running at advertised speed is one of the most common frustrations for PC builders. DDR5 RAM runs at JEDEC standard speeds (typically 4800MHz) by default. You must enable XMP (Intel) or EXPO (AMD) in BIOS to reach advertised speeds. If the speed still doesn’t show correctly, wait for DDR5 memory training to complete—this can take 5‑15 minutes on first boot.
CPU overheating after Intel microcode fix is a growing concern for users of Intel’s 13th and 14th generation processors. The microcode updates—particularly 0x129, 0x12B, and 0x12F—were designed to address excessive voltage requests. However, some users have reported that after applying these fixes, their CPUs run hotter due to higher default voltages and disabled undervolting. The solution is to reset BIOS to Intel Default Settings, adjust power limits (PL1/PL2), and check thermal paste application. For official deployment guidelines regarding these voltage adjustments, check out the Intel Support Portal.
WHEA_UNCORRECTABLE_ERROR BSOD is a critical error indicating hardware failure. It typically points to faulty CPU, RAM, GPU, storage, or power supply. Start by testing your RAM with Windows Memory Diagnostic, checking storage with CHKDSK, and stress‑testing your GPU.
- DDR5 RAM Not Running at Advertised Speed – Enable XMP/EXPO in BIOS, wait for memory training, update BIOS, and verify correct DIMM slots.
- PC Won’t Boot After Enabling XMP – Fix boot failures after enabling XMP. Covers resetting BIOS to defaults, using lower XMP profiles, and manual memory tuning.
- CPU Overheating After Intel Microcode Fix – Resolve increased temperatures after applying Intel’s microcode updates (0x129, 0x12B, 0x12F).
- WHEA_UNCORRECTABLE_ERROR BSOD – Diagnose hardware failures with Windows Memory Diagnostic, CHKDSK, and stress‑testing tools.
- PAGE_FAULT_IN_NONPAGED_AREA Boot Loop – Fix memory‑related BSOD caused by faulty RAM, corrupted drivers, or incorrect virtual memory settings.
- KMODE_EXCEPTION_NOT_HANDLED Blue Screen – Kernel‑mode driver exceptions. Covers driver updates, Fast Startup, and RAM testing.
Graphics & Display Issues
GPU and display problems range from annoying noises to complete visual failures. This hardware and pc troubleshooting hub section highlights core issues like GPU coil whine, second monitor detected but not showing, web camera flickering or green screen, and PCIe 5.0 GPU in PCIe 4.0 slot compatibility.
GPU coil whine is a high‑pitched buzzing sound caused by the rapid switching of currents through inductors on the GPU. While it’s not dangerous, it can be extremely distracting. The most effective fix is capping your frame rate to your monitor’s refresh rate and enabling V‑Sync, G‑Sync, or FreeSync. Undervolting your GPU can also significantly reduce coil whine. To update your graphics stack safely before tweaking hardware parameters, visit the official NVIDIA Driver Downloads portal.
When a second monitor is detected but not showing, the issue often stems from incorrect input sources, resolution mismatches, or driver conflicts. Start by checking the monitor’s input source using the physical buttons on the monitor. Then press Windows + Ctrl + Shift + B to reset the graphics driver.
Web camera flickering or green screen is typically caused by outdated or corrupt camera drivers, incorrect flicker reduction settings, or unstable USB connections. Update your camera driver, adjust Flicker Reduction to 50Hz or 60Hz depending on your region, and try a different USB port.
- GPU Coil Whine – Reduce buzzing sounds with frame rate capping, V‑Sync, and undervolting.
- Second Monitor Detected But Not Showing – Fix black screens by checking input sources, resetting graphics drivers, and adjusting resolution.
- Second Monitor Detected But Not Displaying – Additional fixes including changing projection mode and cable replacement.
- Web Camera Flickering or Green Screen – Fix video artifacts with driver updates, flicker reduction settings, and USB port changes.
- Webcam Flickering or Green Screen – Additional fixes including improving lighting and closing conflicting apps.
- PCIe 5.0 GPU in PCIe 4.0 Slot – Complete compatibility guide covering performance impact (1‑3% loss) and black screen fixes.
- AMD Radeon WattMan Settings Restored Crash – Fix GPU driver crashes caused by overclocking, undervolting, or power supply issues.
Power & Battery Problems
Power issues can cause unexpected shutdowns, charging failures, and system instability. When evaluating power components inside our hardware and pc troubleshooting hub, the most common problems include laptop battery plugged in but not charging and PC shutting down under load.
Laptop battery plugged in but not charging is often caused by battery charge threshold or conservation mode settings. Lenovo, Dell, and Asus laptops have battery health settings that stop charging at a certain percentage to extend battery life. Disabling these settings in the manufacturer’s companion app (Lenovo Vantage, Dell Power Manager, Asus MyASUS) often resolves the issue. If that doesn’t work, uninstalling and reinstalling the battery driver in Device Manager is the next step.
A PC that shuts down under load during gaming or rendering typically indicates overheating or power supply failure. If CPU or GPU temperatures exceed 85‑90°C under load, overheating is the likely cause. If temperatures are normal, check your power supply—an underpowered or failing PSU is a common culprit. Sudden shutdowns without a blue screen error almost always point to either overheating or PSU failure. For verified power management workflows on Windows systems, visit the official Microsoft Support website.
- Laptop Battery Plugged In Not Charging – Fix charging failures by disabling battery conservation modes, updating drivers, and checking power adapters.
- Laptop Battery Plugged In Not Charging – Alternative Guide – Additional fixes including BIOS updates and driver reinstallation.
- PC Shuts Down Under Load – Diagnose overheating and PSU failures that cause sudden shutdowns during gaming or rendering.
Peripherals & Connectivity
Peripherals like keyboards, mice, and connectivity ports can fail in frustrating ways. The hardware and pc troubleshooting hub records show that the most common issues include mechanical keyboard typing double letters, RGB software not saving profiles, KVM switch not detecting keyboard or mouse, Thunderbolt 4 / USB4 devices not working, and front panel USB‑C not working.
Mechanical keyboard typing double letters (key chattering) is often caused by dust inside the switch, worn contacts, or low‑quality switches. Cleaning the switch with compressed air and isopropyl alcohol resolves about 35% of cases. If cleaning doesn’t work, you may need to replace the switch entirely.
Mechanical keyboard RGB software not saving profiles is usually caused by confusion between software lighting and hardware lighting. To persist without the software, you must save your effects to the keyboard’s onboard memory using the “hardware lighting” section managed by the hardware and pc troubleshooting hub device guidelines.
A KVM switch not detecting keyboard or mouse often results from loose cables, power issues, or incorrect USB port usage. A cold reset—disconnecting all cables for 60 seconds—often resolves the issue seamlessly.
- Mechanical Keyboard Typing Double Letters – Fix key chattering with compressed air cleaning, switch replacement, and debounce adjustments.
- Mechanical Keyboard RGB Software Not Saving Profiles – Save custom RGB profiles to onboard memory using hardware lighting sections.
- KVM Switch Not Detecting Keyboard or Mouse – Fix detection failures with cold resets, correct USB ports, and Fast Startup disabling.
- Thunderbolt 4 / USB4 Devices Not Working – Fix detection issues with BIOS settings, driver reinstalls, and power management adjustments.
- Front Panel USB‑C Not Working – Resolve port failures by checking internal header connections, driver updates, and header compatibility.
- Wake‑on‑LAN (WOL) Not Working After Sleep – Enable WOL in BIOS, disable Fast Startup, and configure network adapter settings.
USB & SD Card Issues
USB drives and SD cards are essential for data transfer but frequently encounter write protection and capacity issues. Our dedicated hardware and pc troubleshooting hub catalog identifies the most common problems as USB drive write‑protected errors, SD card read‑only errors, and SD card showing wrong capacity.
A USB drive write‑protected error often persists after registry edits because of a physical lock switch or Diskpart attributes. The most direct fix verified by the hardware and pc troubleshooting hub testing group is using Diskpart to clear the read‑only attribute with attributes disk clear readonly. If that fails, you may need to clean and recreate the partition table entirely.
An SD card read‑only error is most commonly caused by the physical lock switch on the side of the card. Sliding it to the unlock position resolves about 50% of cases. If the switch is not the issue, use Diskpart to clear the read‑only attribute or edit the system registry paths manually.
An SD card showing wrong capacity indicates partition corruption, hidden partitions, or a counterfeit SD card. Diskpart is the most reliable tool to fix this—clean the card, create a new partition, and format it as FAT32 or exFAT. For fake cards, use H2testw to verify the true capacity.
diskpart, list disk, select disk X, and attributes disk clear readonly.- Remove Write Protection from USB Using Diskpart – Clear read‑only attributes and restore full USB access with Diskpart commands.
- USB Drive Write‑Protected Error – Fix write protection after registry edits with physical switch checks, Diskpart, and Group Policy.
- SD Card Read‑Only Error – Resolve read‑only errors with physical lock switches, Diskpart, registry edits, and formatting.
- SD Card Read‑Only Error – Alternative Guide – Additional fixes including card reader changes and formatting.
- SD Card Shows Wrong Capacity – Fix capacity misreporting with Diskpart cleaning, repartitioning, and H2testw verification.
BitLocker & Security
BitLocker encryption is a powerful security feature, but it can also be a source of structural frustration. The most common issue tracked in the hardware and pc troubleshooting hub database remains the BitLocker recovery screen loop after TPM update.
When a BitLocker recovery screen loop occurs after a TPM update, the system repeatedly asks for the recovery key at every boot. This happens because the TPM firmware update changes the TPM’s internal state and PCR values. If you have your 48‑digit recovery key, enter it correctly. If the key is accepted but the loop persists, suspend BitLocker temporarily from the recovery environment using manage-bde -protectors -disable C:. For TPM‑related loops, reset the TPM from BIOS or use the recovery key from your Microsoft account profile details.
In the extensive hardware and pc troubleshooting hub diagnostic experience, 40% of BitLocker loops are caused by simple BIOS changes that can be reversed quickly. If you can boot into Windows successfully, suspending BitLocker from the Manage BitLocker panel will stop the loop permanently.
- BitLocker Recovery Screen Loop After TPM Update – Bypass the loop by entering the recovery key correctly, suspending BitLocker, and resetting TPM.
- BitLocker Recovery Screen Loop Fix – Suspend BitLocker from Windows, find your recovery key online, and fix BIOS/UEFI changes.
Advanced Error Codes & BSOD
Blue Screen of Death (BSOD) errors are among the most serious Windows issues. The most common hardware‑related BSOD errors managed by this hardware and pc troubleshooting hub index include WHEA_UNCORRECTABLE_ERROR, KMODE_EXCEPTION_NOT_HANDLED, and PAGE_FAULT_IN_NONPAGED_AREA.
WHEA_UNCORRECTABLE_ERROR is a critical error indicating abrupt hardware failure—faulty CPU, RAM, GPU, storage, or power supply. Start by testing your RAM with Windows Memory Diagnostic, checking storage with CHKDSK, and stress‑testing your GPU. If a specific component fails testing within the hardware and pc troubleshooting hub protocols, replace it immediately.
KMODE_EXCEPTION_NOT_HANDLED typically indicates a faulty, incompatible, or corrupted device driver infrastructure. The fastest fixes include disabling Fast Startup, updating or rolling back system drivers, and running SFC and DISM. If a file name is displayed in brackets at the end of the error message (e.g., ntoskrnl.exe, netio.sys), note it down—it will help you identify the problem driver quickly.
PAGE_FAULT_IN_NONPAGED_AREA is a classic memory management error that typically points to issues with physical RAM modules, corrupted drivers, or incorrect system settings. Boot into Safe Mode, run Windows Memory Diagnostic, update or roll back problem drivers, and run sfc /scannow to secure the environment.
ntoskrnl.exe, netio.sys, nvlddmkm.sys), note it down—it will help you identify the problem driver configuration instantly.- WHEA_UNCORRECTABLE_ERROR BSOD – Diagnose hardware failures with RAM, storage, GPU, and CPU testing routines.
- KMODE_EXCEPTION_NOT_HANDLED Blue Screen – Fix driver‑related BSOD with Fast Startup disabling, driver updates, and SFC/DISM.
- PAGE_FAULT_IN_NONPAGED_AREA Boot Loop – Resolve memory‑related BSOD with Safe Mode, memory diagnostics, and driver updates.
Core Concepts (Glossary)
To effectively use this comprehensive hardware and pc troubleshooting hub, you need to understand the fundamental concepts that govern how PC hardware works. Below is a technical glossary of the most critical terms referenced throughout our troubleshooting guides.
BSOD (Blue Screen of Death)
A BSOD is a critical system error that forces Windows to restart. The screen displays a stop code (e.g., WHEA_UNCORRECTABLE_ERROR) that identifies the cause. BSOD errors cataloged in the hardware and pc troubleshooting hub are typically caused by hardware failures, driver conflicts, or corrupted system files.
XMP (Extreme Memory Profile) / EXPO
XMP (Intel) and EXPO (AMD) are specialized overclocking profiles that allow DDR5 RAM to run at advertised speeds higher than the JEDEC default. Enabling XMP/EXPO in BIOS is absolutely required to reach full performance tiers.
Conclusion
Maintaining system health requires a centralized repository of knowledge. This official hardware and pc troubleshooting hub serves as your frontline defense against spontaneous component failures, system crashes, and core configuration bottlenecks. By isolating the failure category—whether storage, memory, power, or peripherals—and executing systematic diagnostic commands, you can rescue almost any PC setup from critical downtime. Keep this hardware and pc troubleshooting hub bookmarked as your go‑to engineering manual for future system builds.
Related Hubs
- Windows 11 Troubleshooting Hub
- Android Troubleshooting Hub
- Linux Hub
- Network Troubleshooting Hub
- Gaming Errors Hub
Pingback: Hardware Driver Error Fixes: Complete Troubleshooting Hub (2026)
Pingback: Windows 11 BSOD Error Codes: Complete Fix Guide (2026)
Pingback: AMD Driver Timeout – Complete Guide (2026)
Pingback: GPU Overheating – Complete Guide (2026)
Pingback: PSU Not Enough Power – Complete Guide (2026)